How is patented UniCal technology beneficial in micropipettes?
- February 9, 2023
- ENQUIRE NOW
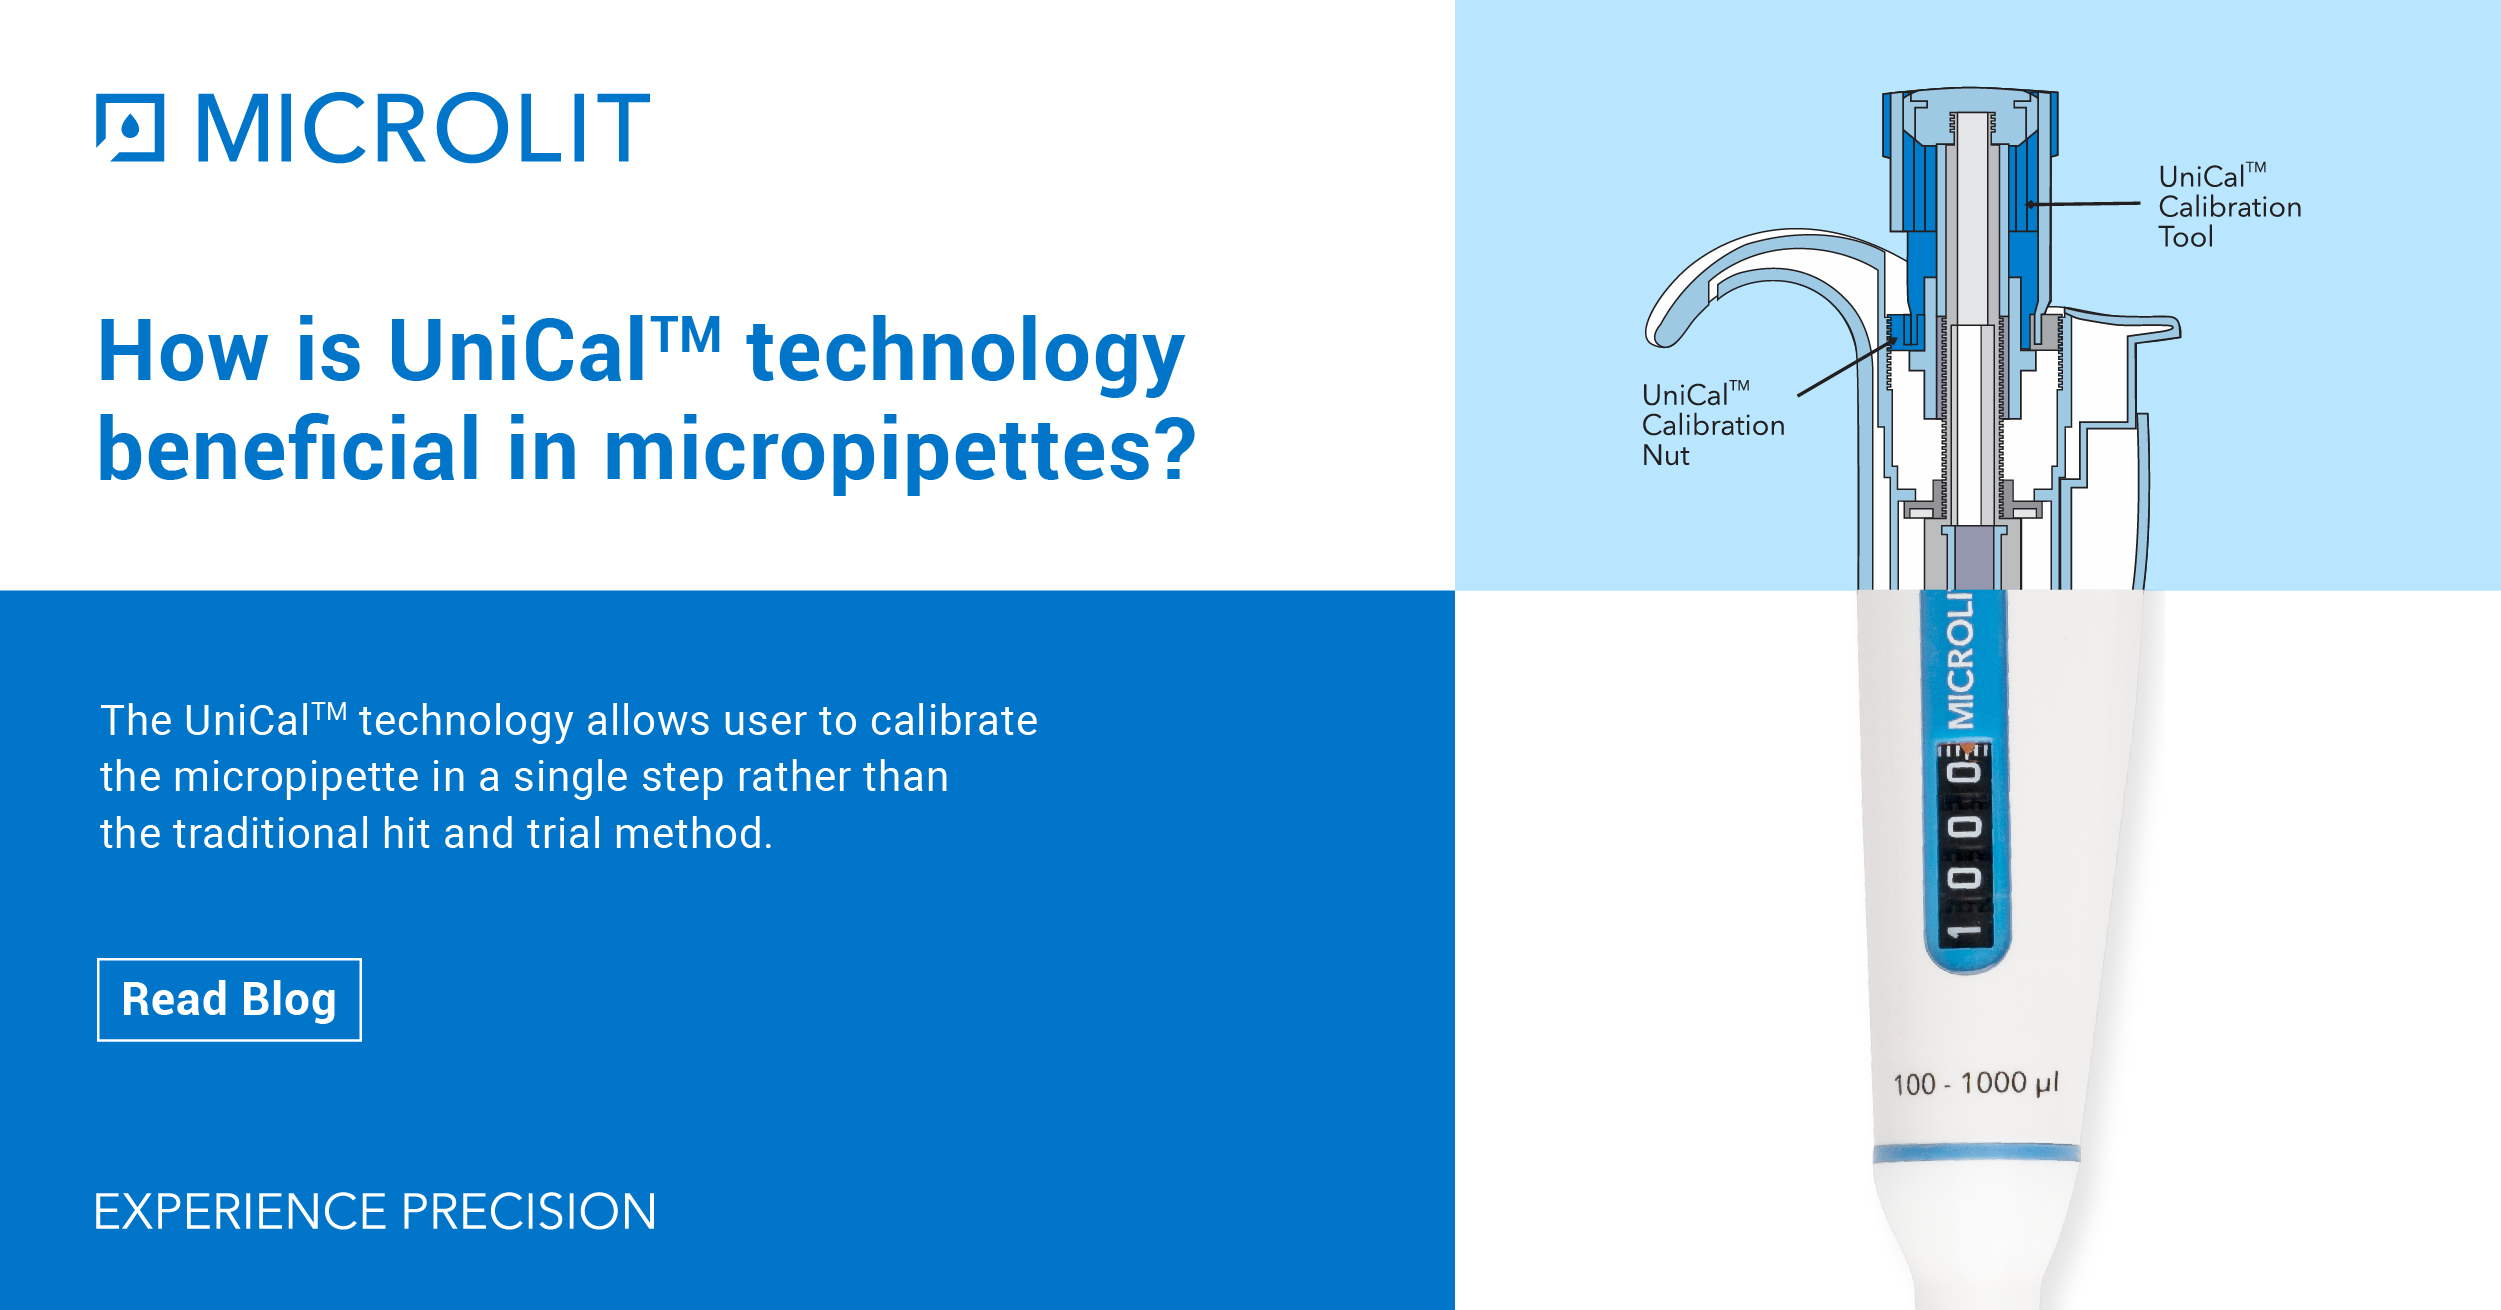
Introduction about UniCal® technology
Microlit’s newest launch and India Design Mark 2021 awardee “Nero® micropipette” has been granted the patent for its unique calibration system, the UniCal® technology that allows quick in-lab calibration in a single operation without disengaging the digits from the plunger mechanism.
*Patent Number is 405607
What is UniCal® Technology?
 A micropipette is a device that is used in conjunction with a tip to transfer an adjustable volume of liquid (usually in micro-litres) from one location to another precisely, in the process of sample preparation for experiments in a laboratory. Manually-operated air-displacement micropipettes, which are most relevant with respect to this application, operate by creating a vacuum via the retraction of a piston located in the micropipette body. Thus, when the open end of an associated pipette tip is immersed in a liquid, the resulting vacuum draws air from the micropipette tip and an equivalent amount of the liquid is consequently drawn into the tip to replace the evacuated air. Movement of the pipette piston is regulated and adjustable in a variable volume micropipette such that a desired amount of liquid is drawn precisely into the tip during the aspiration phase of the pipetting operation. One the liquid is aspirated, the piston can then be pressed to dispense all the liquid in the tip, so that the quantity of liquid is transferred from one location to another during the Dispense Phase of pipetting.
A common drawback to the known micropipettes is the method of calibration of the same when the micropipette is out of calibration or is aspirating/ dispensing a volume of the liquid which is different from the desired quantity of liquid beyond the acceptable error limits (as defined by ISO 8655-2: 2002). For instance, a micropipette with a nominal volume (capacity) of 1000ul is allowed to have a +/-60ul of systematic error and +/- 30ul of random error. If the micropipette exhibits more than the permissible error, it is considered to be out of calibration. In such cases, the micropipette is required to be re-calibrated.
How is UniCal® Technology Beneficial?
Using current methods of micropipette re-calibration, extensive time and effort is required to re-calibrate—particularly when the difference between the current volume setting and a desired volume setting is large (as measured by dispensing liquid into a container being weighed by an analytical balance). For example, in the case of known micropipettes:
- Most calibration procedures rely on hit-and-trial methods and matching markers on a pipette to a chart in an instructional manual, which is time consuming and frustrating.
- Some calibration procedures require disassembly of certain pipette components which makes the procedure complex and time-consuming.
- The time-consuming and complex nature of current pipette calibration mechanisms forces users to send pipettes for expensive and time-consuming re-calibration at third-party facilities even for minor adjustments.
Current Calibration Procedures
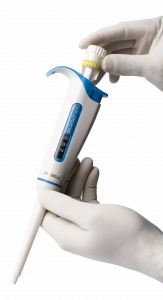 All calibration procedures require the determination of an average weighted dispense volume (at a particular set/desired volume) by dispensing multiple samples into a container measured by an analytical balance. After the average weighted volume is determined, one of the following methods are used for recalibration.
Method 1: Matching Revolutions/Markers to Adjustment Chart in the Manual
This mechanism requires the user to use a calibration tool provided with the micropipette to adjust the calibration of the pipette using a hit-and-trial method. After the average weighted dispense volume of the pipette is determined, the technician is supposed to adjust the calibration nut using the calibration tool according to a scale marking on the pipette body. The scale on the pipette has to be matched to a chart (usually provided in the user manual) to figure out the actual volume adjustment made on the pipette.
Disadvantage: Since the scale has a LOW resolution and the markings on the scale have to be matched visually (not accurate), this mechanism requires the user to repeat the process of adjusting the calibration nut multiple times (hit-and-trial) until the desired volume is being dispensed consistently. This process is inefficient and therefore, time-consuming.
Method 2: Calibration by disassembling and disengaging the digits from the plunger mechanism
After the average weighted dispense volume is determined, this mechanism requires the user to disassemble the grippy of the micropipette and disengage the digits from the plunger mechanism. The average weighted dispensed volume can then be set on the digital mechanism (digits) by rotating the plunger without changing the dispensed volume of the micropipette. The digits then need to be re-engaged to the plunger mechanism and the component have to be re-assembled. If the pipette is still not calibrated, the disassembly procedure has to be repeated. Even though this is not a hit-and-trial method, the requirement for disassembly and reassembly of micropipette components makes the procedure complex and time-consuming.
Difference between usual Micropipette’s Calibration Nut and Microlit’s Calibration Nut:
Plunger: Found below the plunger ring, the plunger has 2 major functions:
a) Aspirate and dispense the liquid in the micropipette tip – The plunger has two steps/stages. For aspiration, the plunger is pressed to the first stage and released. For dispensing, the plunger is pressed to the first stage and then pressed to the second stage to release any remaining liquid from the tip. This ensures accuracy of a micropipette.
b) Driving the Digital System – The rotation mechanism of the plunger drives the display measuring meter, which helps adjust both the displayed volume on the micropipette device and the corresponding vertical plunger/piston movement.
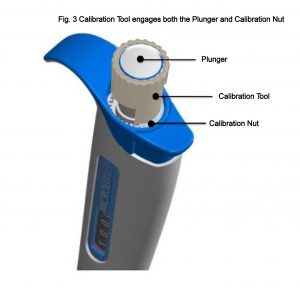
Calibration Nut: The calibration nut defines the bottom point during the movement of the plunger. The position of the nut can be adjusted with the help of a calibration tool for slight adjustments during the calibration process. This increases or decreases the vertical movement (depending on the rotation of the tool) of the plunger and hence the aspirated/dispensed volume.
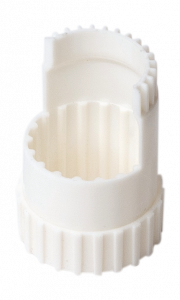 Microlit Calibration tool: It helps in configuring the micropipette to get desired accuracy and precision. The tool engages the plunger, calibration nut, and the digits of the pipette and can be used to configure the pipette without disassembling any components or disengaging the digits.
Threaded part: The threaded part allows the vertical movement of the plunger upon rotation. This vertical movement adjusts the set volume of the micropipette.
Display System: The display system displays the current set volume of the micropipette. It can be adjusted by rotating the plunger.
Ejector button: The press of the ejector button allows the removal of the tip (attachment) from the micropipette without touching the tip. This prevents any possible contamination
How to calibrate a micropipette with UniCal® Technology?
If the performance results of the micropipette are no longer within the recommended values (as defined by ISO 8655:2-2002) or if changes occur in physical parameters (liquid density, temperature), recalibration can be performed using the Microlit Calibration Tool by following the procedure:
1) Perform at least 5 measurements on the nominal volume of the pipette and calculate the average weighted dispense volume as measured by an analytical balance.
2) Engage the Microlit Calibration Tool with the plunger and the calibration nut and adjust the digits to display the average weighted dispense volume. Once the average weighted volume is displayed, the pipette has been recalibrated. It is that simple!
3) Perform a few plunger operations to check the resulting volume.
The experimental data below presents evidence for this unique mechanism.
An uncalibrated Single Channel Variable Volume Pipette 100-1000ul was taken for this purpose.
To calibrate the pipette, we performed measurements of the dispensed volume on an analytical balance and took an arithmetic mean of the readings and multiplied it with the Z factor (1.0026) to convert from the weight observed on the balance to the dispensed volume. The value obtained 989.5ul is the average weighted volume before calibration.
The obtained average weighted volume 989.5ul was set on the digital system (digits) using the Microlit Calibration Tool in a Single Operation. Theoretically, this should have re-calibrated the pipette.
To test the calibration, 5 more readings were taken at the nominal volume (1000ul). The results are recorded in the table below.
Table Illustrating the measurements performed before and after calibrating the pipette using the single operation method.
 *This has to be noted that all the measurements were taken on the analytical balance under suitable laboratory environments.
Chart 1.1: Depicting the resultant differences in the readings calculated before & after calibration
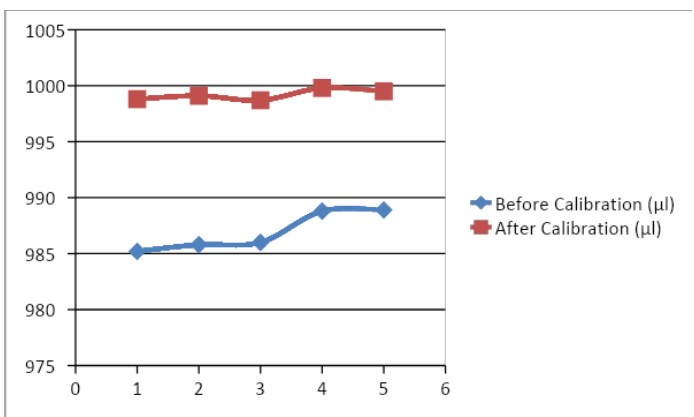
 We can observe from the data above that the micropipette was calibrated in a simple single operation using the Microlit Calibration tool.
The Brown line depicts that the data is accurate and is under calibrated volume (as per ISO norms). No Hit-And-Trial methods were used for the calibration of the pipette.
The Pictures section also includes a sample laboratory-generated calibration certificate which will accompany the calibrated pipette.
Merits of UniCal® Technology
- It eliminates the inconvenience caused by the hit-and-trial method of calibration.
- It saves the cost and time of sending the instrument to another facility for third party calibration.
- It enables the user to re-calibrate without disassembling any component, disengaging the digits from the plunger or matching calibration markers on the micropipette to the volume adjustment chart in the user manual.
To get free demo/installation/information, email us at info@microlit.com or visit our product range: https://www.microlit.com/product-category/micropipettes/

