
Right from the design of a product to its delivery, we make sure that every step is carried out keeping you, the user, in mind. You are at the heart of our organisation. We are constantly striving for excellent customer service and support with the help of our service suite which includes information related to training, repair/recalibration, remote support, warranties and answering the most frequently asked product related questions.
Microlit Product FAQ’s
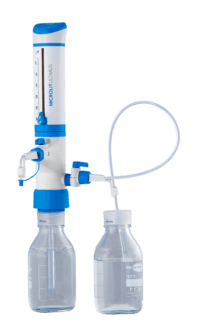
Problem
Piston difficult to move
Possible Cause
Formation of crystals or deposition of dirt.
Solution
Stop dispensing immediately. Loosen piston in circular motion, but do not disassemble. Follow the cleaning instructions as specified in the Operation Manual.
Problem
Air bubbles appear in the instrument.
Possible Cause
Reagent with high vapour pressure has been drawn in too quickly.
Solution
Draw the reagent slowly.
Possible Cause
The instrument has not been primed.
Solution
Prime the instrument as specified in the Operation Manual.
Possible Cause
Filling tube is loose or damaged.
Solution
Press the filling tube firmly if necessary, cut off approx. 1 cm of the tube at the upper end and then reconnect it or replace it.
Possible Cause
The filling action is too fast.
Solution
Fill and dispense slowly.
Possible Cause
The piston is leaking.
Solution
Clean the piston as specified in the Operation Manual. If problem persists, replace it.
Possible Cause
The discharge valve is leaking.
Solution
Clean by flushing thoroughly with distilled water as specified in the Operation Manual.
Problem
Dispensing not possible
Possible Cause
Dispensing nozzle is blocked.
Solution
Disassemble the dispensing nozzle and flush thoroughly with distilled water.
Possible Cause
The instrument has not been primed.
Solution
Prime the instrument as specified in the Operation Manual.
Possible Cause
Discharge valve is stuck.
Solution
Clean the unit by immersing valve assembly in distilled water as specified in the Operation Manual.
Possible Cause
Recirculation knob is rotated in the wrong direction and the knob has popped out.
Solution
Set the recirculation knob in the dispense mode and press the knob firmly to ensure it is tightly fitted.
Problem
No aspiration from second inlet.
Possible Cause
Second inlet tube is not properly connected.
Solution
Unscrew the second inlet tube and reassemble as per the instructions specified in the Operation Manual.
Possible Cause
Second inlet knob is rotated in the wrong direction and the knob has popped out.
Solution
Set the knob in the second inlet aspiration mode and press the knob firmly to ensure it is tightly fitted.
Problem
Wrong dispensing volume.
Possible Cause
The instrument is not calibrated.
Solution
Follow user calibration steps as specified in the Operation Manual.
Possible Cause
Crack in the cylinder barrel due to an accident can cause leakage.
Solution
Do not try to repair. Contact the nearest dealer or manufacturer.
Problem
Barrel does not fill with liquid.
Possible Cause
Inlet tube is not fitted firmly.
Solution
Connect inlet tube correctly as specified in the Operation Manual.
Problem
Filling not possible
Possible Cause
Valve ball is stuck in the seat.
Solution
Mount the dispenser on a distilled water bottle. Put your thumb on the delivery nozzle or close the cap. Now fill the dispenser. Once the liquid fills up, remove your thumb/cap. If this does not work, then use a pointed instrument like a pipette tip to press and release the ball from the valve.
Problem
Auto-dripping (plunger comes down on its own without applying manual force for dispensing).
Possible Cause
Incorrect method of autoclaving causes the piston to become loose.
Solution
Follow the autoclaving instructions as specified in the Operation Manual. To tighten the piston, follow the disassembly instructions. After that, tighten the piston by rotating clockwise and reassemble. Make sure that the piston is not overtight as that can break the glass barrel.
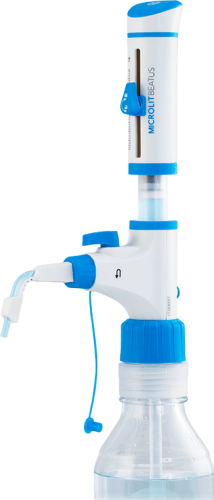
Problem
Piston difficult to move
Possible Cause
Formation of crystals or deposition of dirt.
Solution
Stop dispensing immediately. Loosen piston in circular motion, but do not disassemble. Follow the cleaning instructions as specified in the Operation Manual.
Problem
Air bubbles appear in the instrument.
Possible Cause
Reagent with high vapour pressure has been drawn in too quickly.
Solution
Draw the reagent slowly.
Possible Cause
The instrument has not been primed.
Solution
Prime the instrument as specified in the Operation Manual.
Possible Cause
Filling tube is loose or damaged.
Solution
Press the filling tube firmly if necessary, cut off approx. 1 cm of the tube at the upper end and then reconnect it or replace it.
Possible Cause
The filling action is too fast.
Solution
Fill and dispense slowly.
Possible Cause
The piston is leaking.
Solution
Clean the piston as specified in the Operation Manual. If problem persists, replace it.
Possible Cause
The discharge valve is leaking.
Solution
Clean by flushing thoroughly with distilled water as specified in the Operation Manual.
Problem
Dispensing not possible
Possible Cause
Dispensing nozzle is blocked.
Solution
Disassemble the dispensing nozzle and flush thoroughly with distilled water.
Possible Cause
The instrument has not been primed.
Solution
Prime the instrument as specified in the Operation Manual.
Possible Cause
Discharge valve is stuck.
Solution
Clean the unit by immersing valve assembly in distilled water as specified in the Operation Manual.
Possible Cause
Recirculation knob is rotated in the wrong direction and the knob has popped out.
Solution
Set the recirculation knob in the dispense mode and press the knob firmly to ensure it is tightly fitted.
Problem
Wrong dispensing volume.
Possible Cause
The instrument is not calibrated.
Solution
Follow user calibration steps as specified in the Operation Manual.
Possible Cause
Crack in the cylinder barrel due to an accident can cause leakage.
Solution
Do not try to repair. Contact the nearest dealer or manufacturer.
Problem
Barrel does not fill with liquid.
Possible Cause
Inlet tube is not fitted firmly.
Solution
Connect inlet tube correctly as specified in the Operation Manual.
Problem
Filling not possible
Possible Cause
Valve ball is stuck in the seat.
Solution
Mount the dispenser on a distilled water bottle. Put your thumb on the delivery nozzle or close the cap. Now fill the dispenser. Once the liquid fills up, remove your thumb/cap. (Pic) If this does not work, then use a pointed instrument like a pipette tip to press and release the ball from the valve. (Pic)
Problem
Auto-dripping (plunger comes down on its own without applying manual force for dispensing).
Possible Cause
Incorrect method of autoclaving causes the piston to become loose.
Solution
Follow the autoclaving instructions as specified in the Operation Manual. To tighten the piston, follow the disassembly instructions. After that, tighten the piston by rotating clockwise and reassemble. Make sure that the piston is not overtight as that can break the glass barrel.
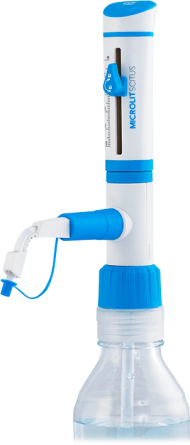
Problem
Piston difficult to move
Possible Cause
Formation of crystals or deposition of dirt.
Solution
Stop dispensing immediately. Loosen piston in circular motion, but do not disassemble. Follow the cleaning instructions as specified in the Operation Manual.
Problem
Air bubbles appear in the instrument.
Possible Cause
Reagent with high vapour pressure has been drawn in too quickly.
Solution
Draw the reagent slowly.
Possible Cause
The instrument has not been primed.
Solution
Prime the instrument as specified in the Operation Manual.
Possible Cause
Filling tube is loose or damaged.
Solution
Press the filling tube firmly if necessary, cut off approx. 1 cm of the tube at the upper end and then reconnect it or replace it.
Possible Cause
The filling action is too fast.
Solution
Fill and dispense slowly.
Possible Cause
The piston is leaking.
Solution
Clean the piston as specified in the Operation Manual. If problem persists, replace it.
Possible Cause
The discharge valve is leaking.
Solution
Clean by flushing thoroughly with distilled water as specified in the Operation Manual.
Problem
Dispensing not possible
Possible Cause
Dispensing nozzle is blocked.
Solution
Disassemble the dispensing nozzle and flush thoroughly with distilled water.
Possible Cause
Discharge valve is stuck.
Solution
Clean the unit by immersing valve assembly in distilled water as specified in the Operation Manual.
Problem
Wrong dispensing volume.
Possible Cause
The instrument is not calibrated.
Solution
Follow user calibration steps as specified in the Operation Manual.
Possible Cause
Crack in the cylinder barrel due to an accident can cause leakage.
Solution
Do not try to repair. Contact the nearest dealer or manufacturer.
Problem
Barrel does not fill with liquid.
Possible Cause
Inlet tube is not fitted firmly.
Solution
Connect inlet tube correctly as specified in the Operation Manual.
Problem
Auto-dripping (plunger comes down on its own without applying manual force for dispensing).
Possible Cause
Incorrect method of autoclaving causes the piston to become loose.
Solution
Follow the autoclaving instructions as specified in the Operation Manual. To tighten the piston, follow the disassembly instructions. After that, tighten the piston by rotating clockwise and reassemble. Make sure that the piston is not overtight as that can break the glass barrel.
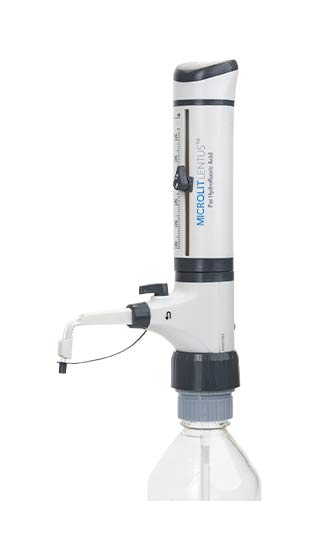
Problem
Piston difficult to move
Possible Cause
Formation of crystals or deposition of dirt.
Solution
Stop dispensing immediately. Loosen piston in circular motion, but do not disassemble. Follow the cleaning instructions as specified in the Operation Manual.
Problem
Air bubbles appear in the instrument.
Possible Cause
Reagent with high vapour pressure has been drawn in too quickly.
Solution
Draw the reagent slowly.
Possible Cause
The instrument has not been primed.
Solution
Prime the instrument as specified in the Operation Manual.
Possible Cause
Filling tube is loose or damaged.
Solution
Press the filling tube firmly if necessary, cut off approx. 1 cm of the tube at the upper end and then reconnect it or replace it.
Possible Cause
The filling action is too fast.
Solution
Fill and dispense slowly.
Possible Cause
The piston is leaking.
Solution
Clean the piston as specified in the Operation Manual. If problem persists, replace it.
Possible Cause
The discharge valve is leaking.
Solution
Clean by flushing thoroughly with distilled water as specified in the Operation Manual.
Problem
Dispensing not possible
Possible Cause
Dispensing nozzle is blocked.
Solution
Disassemble the dispensing nozzle and flush thoroughly with distilled water.
Possible Cause
The instrument has not been primed.
Solution
Prime the instrument as specified in the Operation Manual.
Possible Cause
Discharge valve is stuck.
Solution
Clean the unit by immersing valve assembly in distilled water as specified in the Operation Manual.
Possible Cause
Recirculation knob is rotated in the wrong direction and the knob has popped out.
Solution
Set the recirculation knob in the dispense mode and press the knob firmly to ensure it is tightly fitted.
Problem
Wrong dispensing volume.
Possible Cause
The instrument is not calibrated.
Solution
Follow user calibration steps as specified in the Operation Manual.
Possible Cause
Crack in the cylinder barrel due to an accident can cause leakage.
Solution
Do not try to repair. Contact the nearest dealer or manufacturer.
Problem
Barrel does not fill with liquid.
Possible Cause
Inlet tube is not fitted firmly.
Solution
Connect inlet tube correctly as specified in the Operation Manual.
Problem
Filling not possible
Possible Cause
Valve ball is stuck in the seat.
Solution
Mount the dispenser on a distilled water bottle. Put your thumb on the delivery nozzle or close the cap. Now fill the dispenser. Once the liquid fills up, remove your thumb/cap. (Pic) If this does not work, then use a pointed instrument like a pipette tip to press and release the ball from the valve. (Pic)
Problem
Auto-dripping (plunger comes down on its own without applying manual force for dispensing).
Possible Cause
Incorrect method of autoclaving causes the piston to become loose.
Solution
Follow the autoclaving instructions as specified in the Operation Manual. To tighten the piston, follow the disassembly instructions. After that, tighten the piston by rotating clockwise and reassemble. Make sure that the piston is not overtight as that can break the glass barrel.
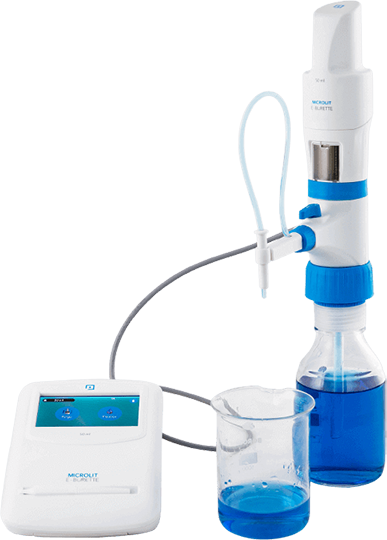
MICROLIT E-BURETTE – Electronic Burette with 3 Calibrated Pre-set Speeds
Problem
Piston difficult to move
Possible Cause
Formation of crystals or deposition of dirt.
Solution
Perform a cleaning cycle.
Problem
Filling not possible
Possible Cause
Filling valve stuck.
Solution
Clean the filling valve. If the valve ball is stuck, use a 200 µl plastic tip to loosen it.
Problem
Air bubbles appear in the instrument.
Possible Cause
Purging not complete
Solution
Purge the instrument again.
Possible Cause
Filling tube loose or damaged.
Solution
Fasten the telescopic filling tube firmly. If necessary, cut the tube off by approx. 1 cm from the top or replace it.
Possible Cause
Filling tube does not dip into the liquid
Solution
Fill up the bottle, or correctly adjust the length of the telescopic filling tube.
Problem
The volume delivered is smaller than that indicated
Possible Cause
The instrument has not been completely primed.
Solution
Prime the instrument again.
Problem
The instrument doesn’t indicate any function
Possible Cause
Internal error
Solution
Perform a restart.
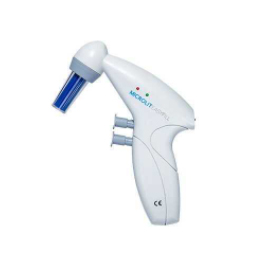
Problem
Liquid drips from the pipette.
Possible Cause
Pipette is not firmly fixed.
Solution
Recheck the fitting.
Possible Cause
There is leakage in the collet assembly.
Solution
Ensure that the collet has been rightly fixed.
Possible Cause
There is leakage from the inside connections.
Solution
Send the instrument to your nearest dealer or manufacturer.
Problem
Pump is not working.
Possible Cause
Battery is discharged.
Solution
Charge the battery.
Possible Cause
Connection is broken.
Solution
Send the instrument to the nearest dealer or manufacturer.
Possible Cause
Speed controller is set to its lowest position.
Solution
Adjust the speed controller.
Problem
Speed cannot be set.
Possible Cause
Speed adjustment wheel is broken.
Solution
Do not try to repair. Contact the nearest dealer or manufacturer.

Problem
Liquid is leaking from pipette tip.
Possible Cause
Pipette tip does not fit properly onto the tip cone.
Solution
Use the appropriate tip for exact tip fitment.
Possible Cause
Liquid being pipetted is hot or cold. Liquid being pipetted is very dense or viscous.
Solution
Shorten the amount of time the liquid is in the tip, or the possible solution is to use the reverse mode of pipetting.
Possible Cause
Pipette sealing O ring is worn.
Solution
Replace the sealing O ring.
Possible Cause
Tip is not loaded to maintain the seal.
Solution
Press on tip more firmly. (Avoid using too much force and over inserting the tip.)
Problem
Amount of sample delivered is not accurate.
Possible Cause
Pipette is not within calibration specifications.
Solution
Re-calibrate the pipette as per the operation manual.
Possible Cause
Improper pipetting technique.
Solution
See suggestions for improving pipetting technique and results.
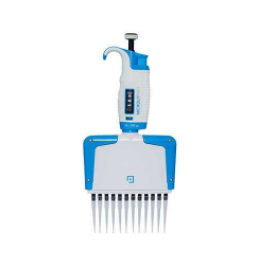
Problem
Liquid is leaking from pipette tip.
Possible Cause
Pipette tip does not fit properly onto the tip cone.
Solution
Use the appropriate tip for exact tip fitment.
Possible Cause
Liquid being pipetted is hot or cold. Liquid being pipetted is very dense or viscous.
Solution
Shorten the amount of time the liquid is in the tip, or the possible solution is to use the reverse mode of pipetting.
Possible Cause
Foreign particles between tip and tip cone.
Solution
Clean the tip cone with a lint free cloth and attach new tips.
Possible Cause
Tip is not loaded to maintain the seal.
Solution
Press on tip more firmly. (Avoid using too much force and over inserting the tip.)
Problem
Amount of sample delivered is not accurate.
Possible Cause
Pipette is not within calibration specifications.
Solution
Re-calibrate the pipette as per the operation manual.
Possible Cause
Improper pipetting technique.
Solution
See suggestions for improving pipetting technique and results.
-
Training
Microlit Academy – learn from the industry’s bestLearn how to make the best and the most effective use of our high precision liquid handling instruments at the Microlit Academy.
- Get hands-on training by experienced professionals.
- Become a ‘MICROLIT Certified Operator’ or ‘MICROLIT Certified Calibrator’.
- Get access to our huge knowledge repository.
Interested?Get in touch with us for more details.
-
 REPAIR & RECALIBRATEGet your equipment repaired and recalibrated at your convenience
If you’ve been using liquid handling instruments for a long period of time, bring them to us for recalibration. In addition, we also provide repairs against mechanical damages.
- Get zero-cost product examination to assess the degree of damage / aging.
- Repair and recalibration done by experienced technical experts.
- Take better care of your equipment with our free tips and tricks.
Interested?Get in touch with us for more details.
-
 REMOTE SUPPORTAlways at your service
At Microlit, we are available at your service with our advice, assistance and consultation, as and when you need it.
- Get 24*7, zero-cost consultation from our highly trained staff of specialists.
- Approach us with all kinds of questions, doubts, queries or even feedback and get holistic support.
Interested?Get in touch with us for more details.
-
 WARRANTYEnjoy extended warranties across our product range
As a part of our periodic offers, we offer extended warranties on our products, thereby facilitating enhanced user reliance and peace of mind.
- Time and again, we selectively offer extended warranties across our product range.
- Warranties generally last for the time period specified on product packaging.
Interested?Get in touch with us for more details.
